It is a small daemon that aggregates custom monitoring metrics collected from Google Dataflow workers that use metrics-flow library and exposes them to Prometheus.
How it works
Google Dataflow workers with metrics-flow plugged in pre-aggregate custom monitoring metrics using pipeline windowing functions and dump
the results into a Google Pub/Sub topic. The metrics flow daemon polls a subscription to the topic, converts received metric update events to Prometheus format and exposes them through /metrics endpoint.
Create an empty directory on your host machine (say, % mkdir ~/.mflowd)
Download the service account key in JSON format and put it to the created directory
Finally run the countainer:
% docker run -e "MFLOWD_SUB=<subscription_id>" -v $HOME/.mflowd:/etc/mflowd 'mflowd:latest'
Using docker-compose
You can also run both mflowd and prometheus docker images using docker-compose:
% cd ~/go/src/github.com/QubitProducts/mflowd
% mkdir gcp
# download your service account JSON key to gcp directory
% cat > .env
MFLOWD_SUB=<subscription_id>
MFLOWD_VERBOSE=0 # set to 1 to turn verbose mode on
^C
% docker-compose up
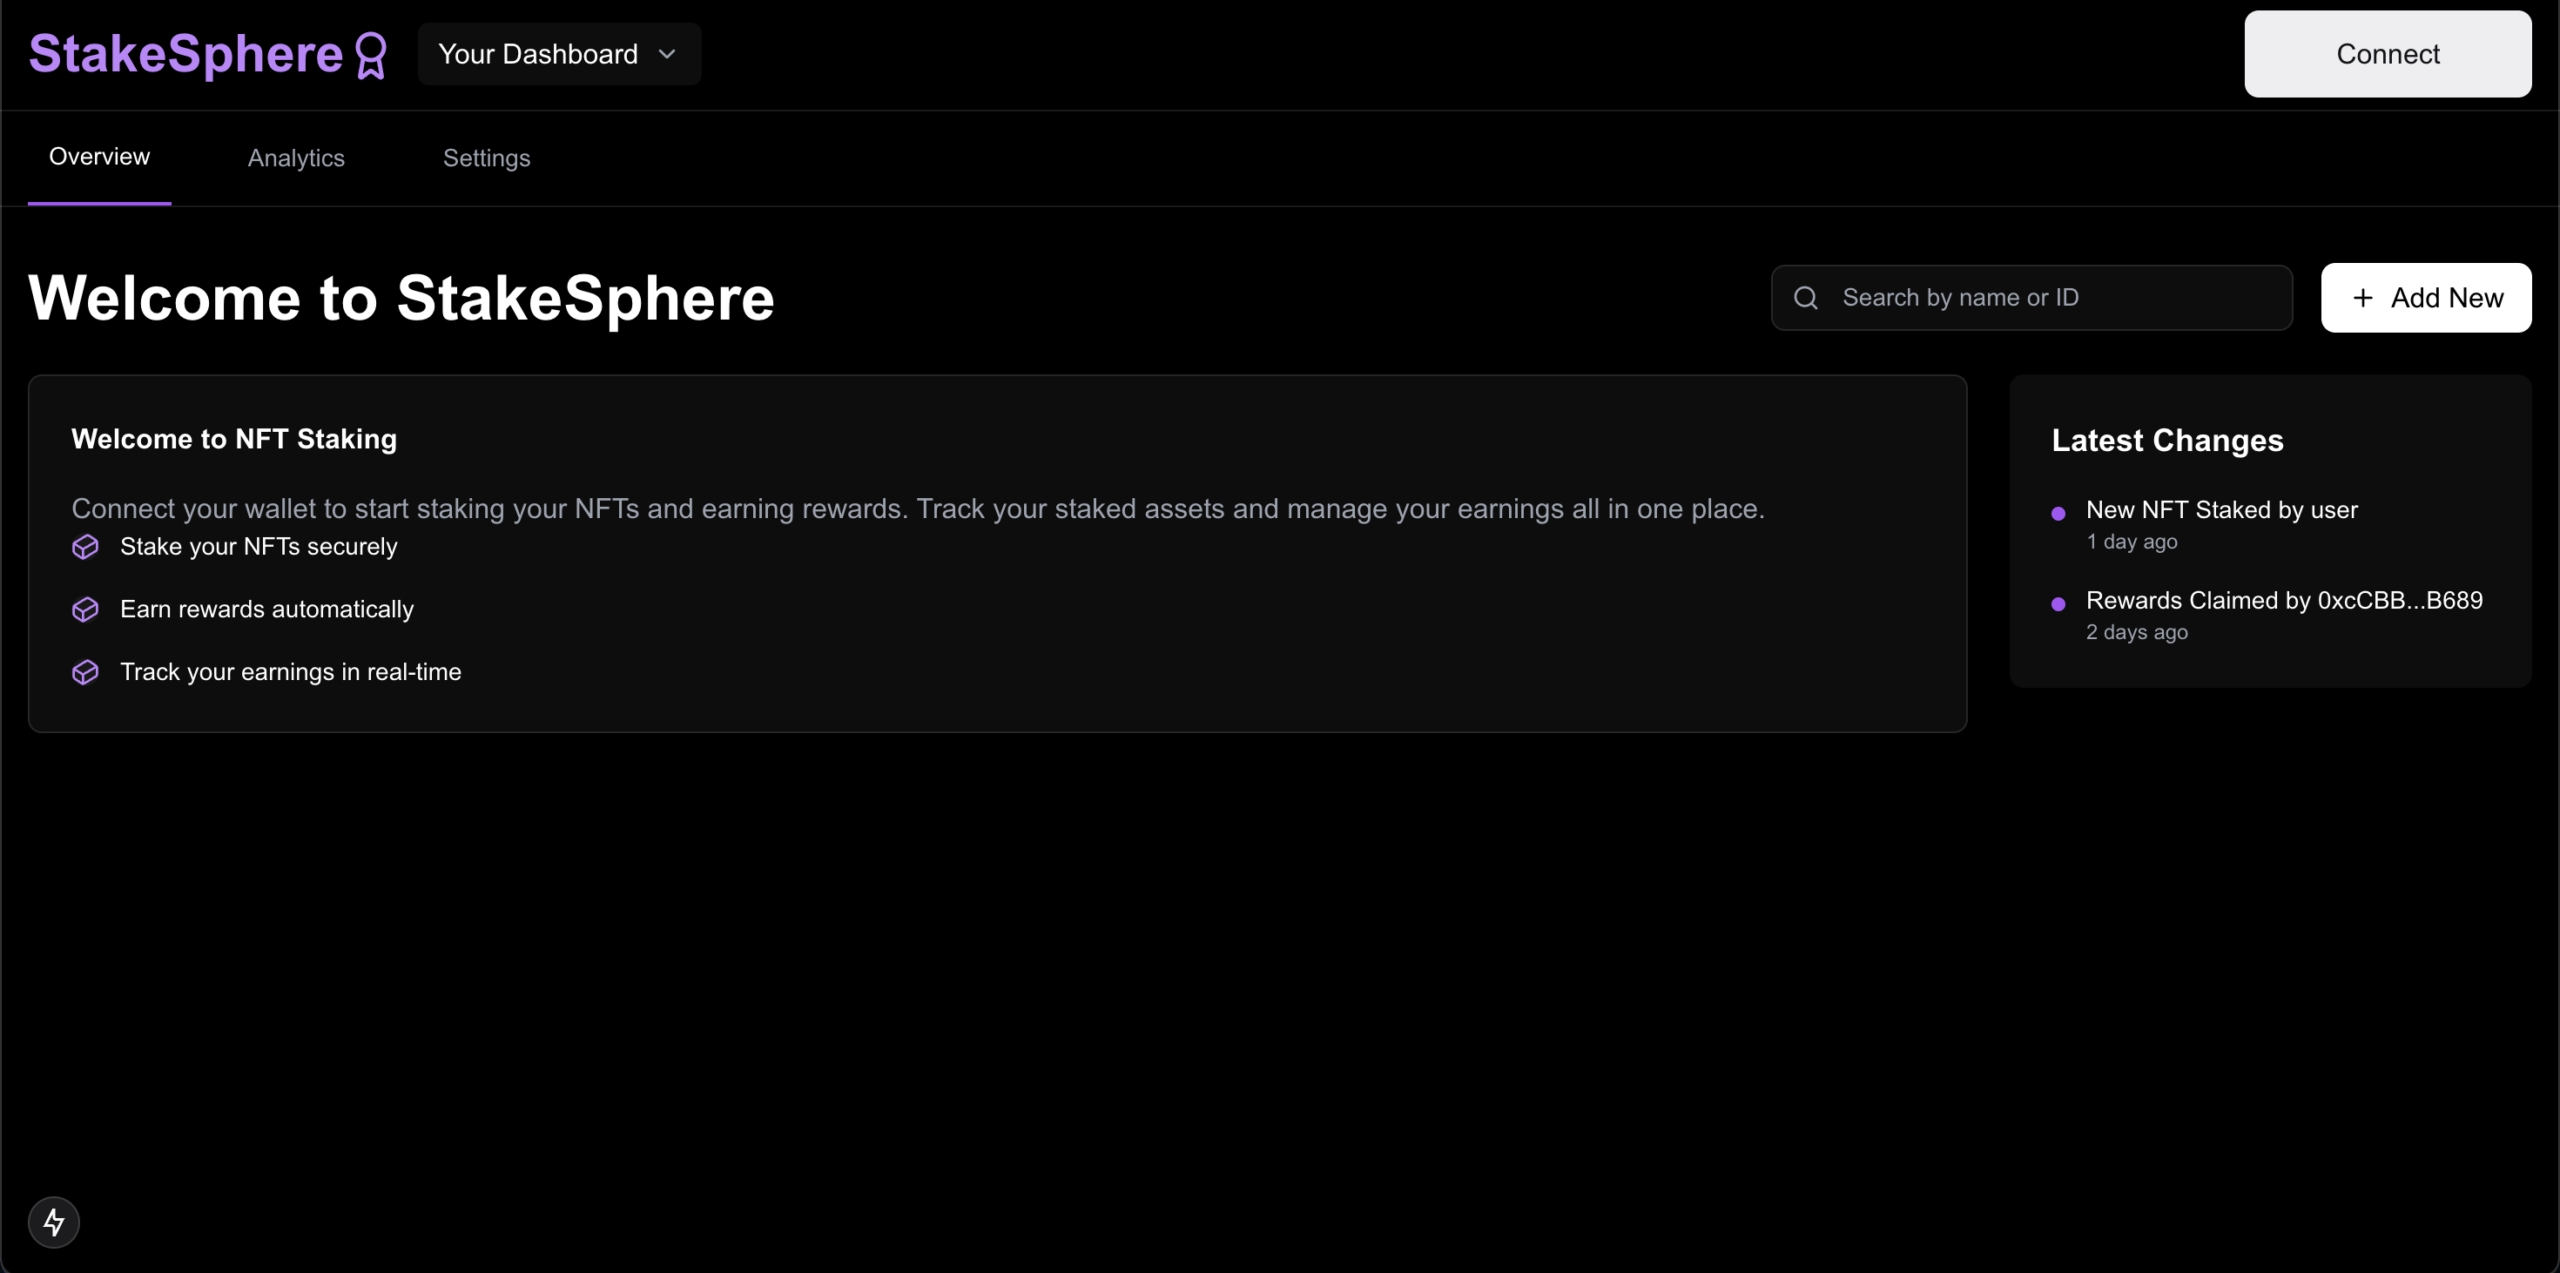
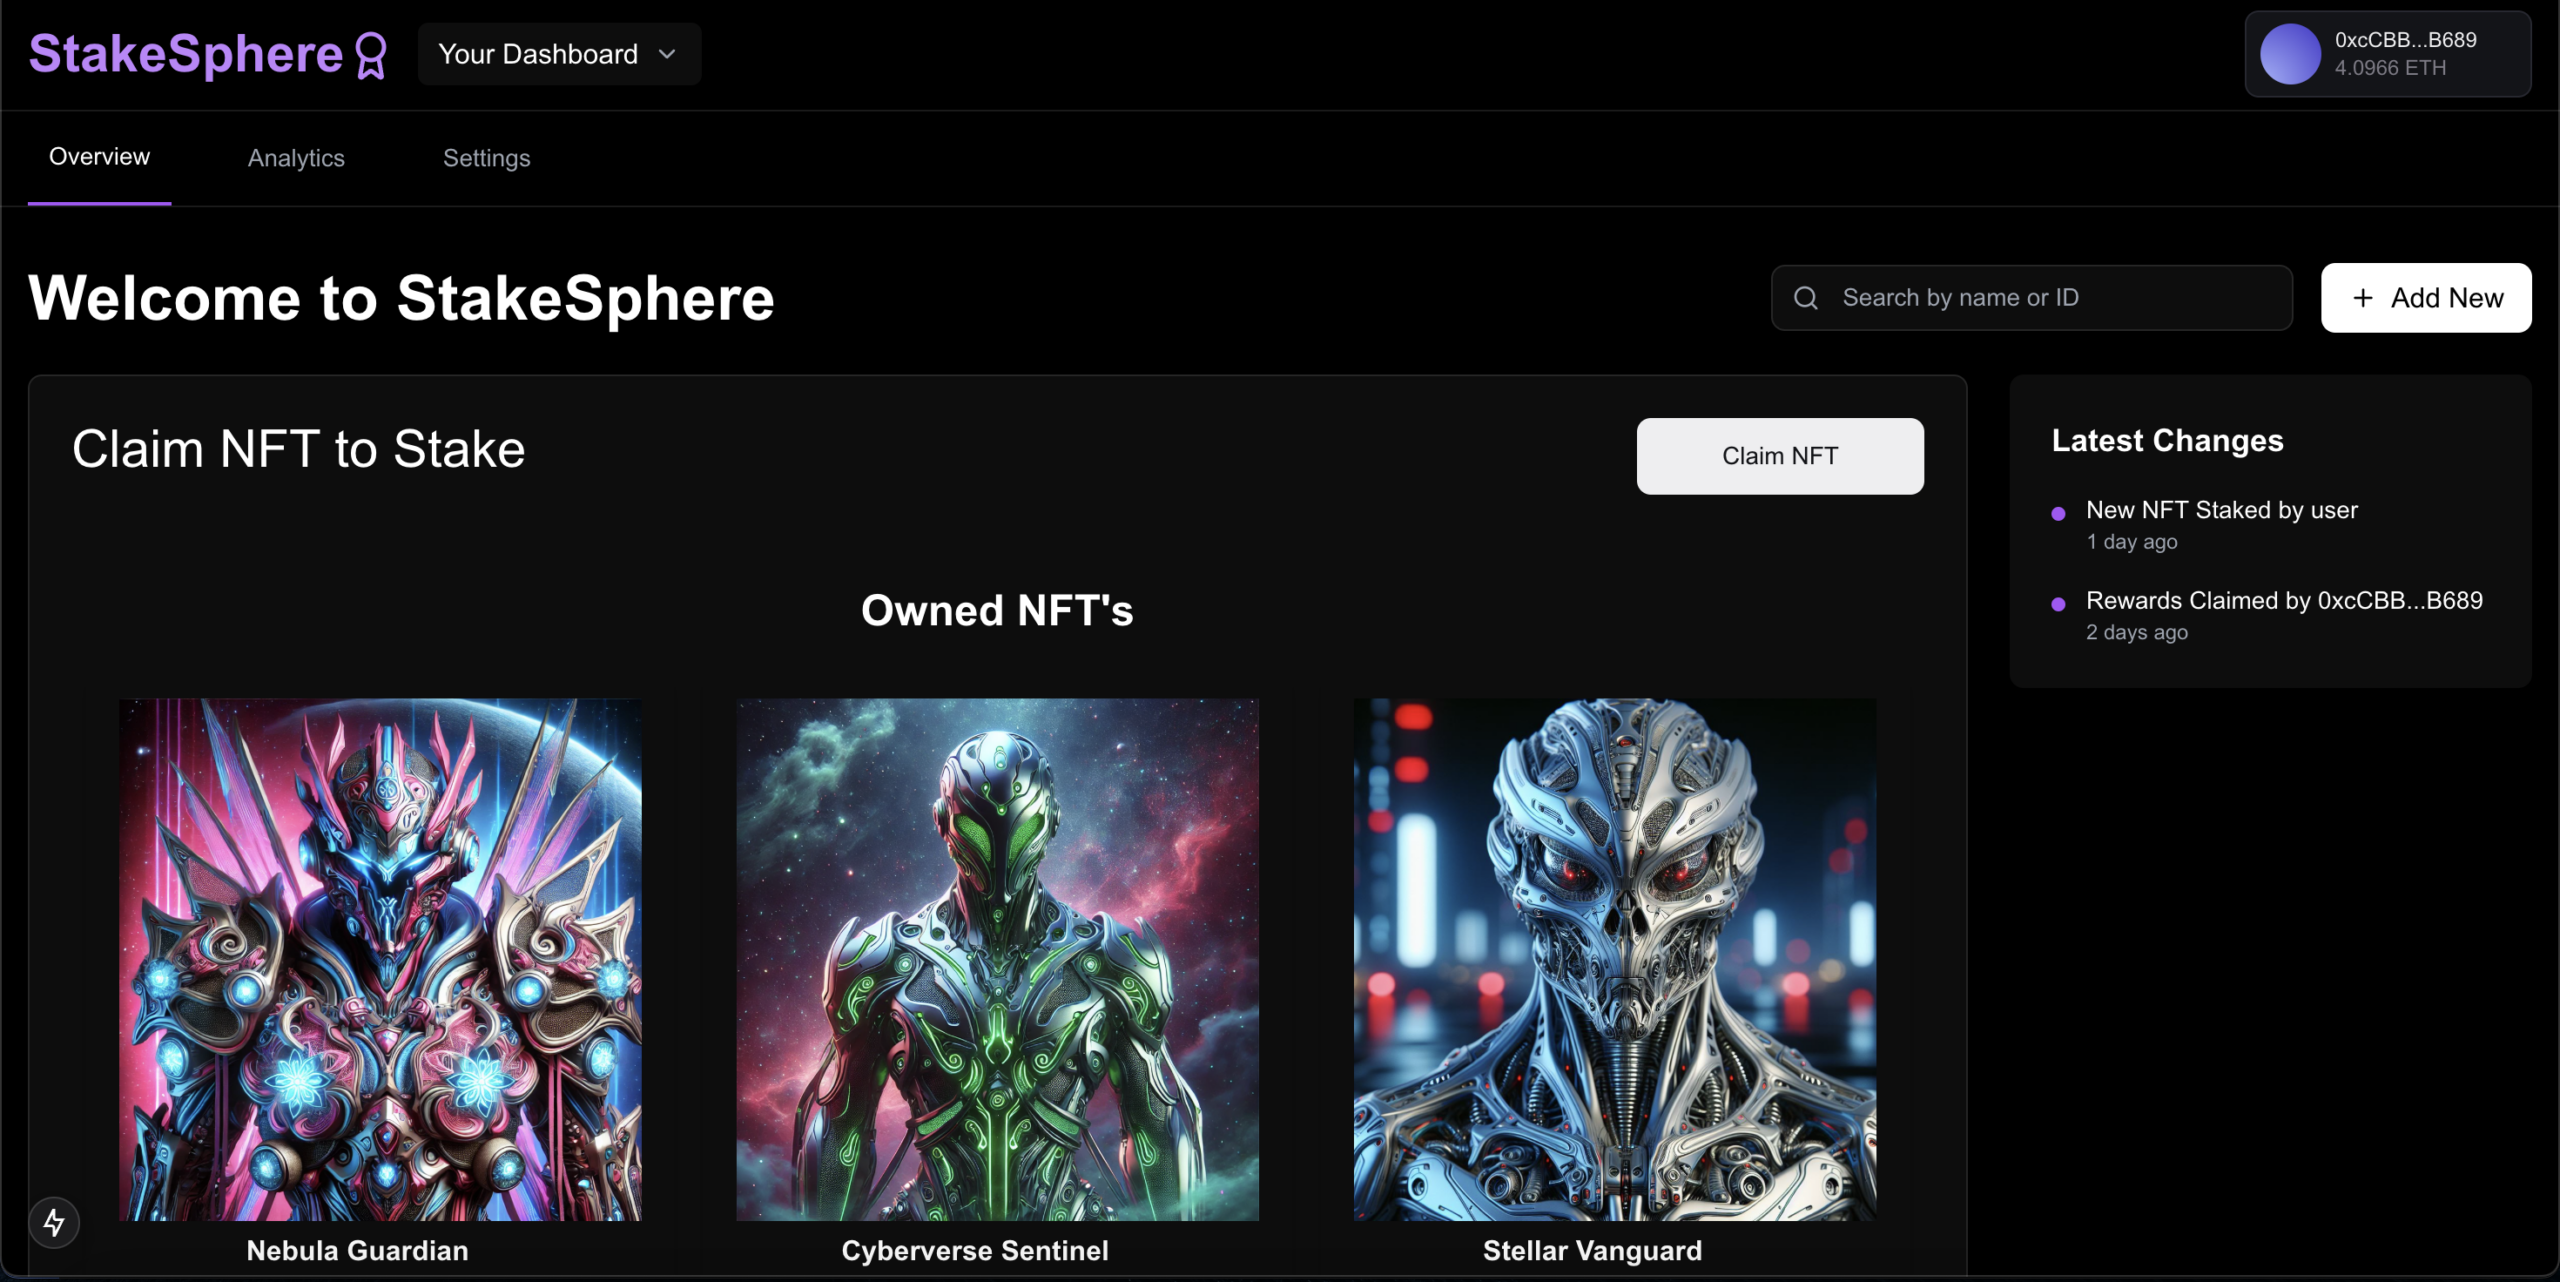
StakeSphere is an NFT Staking Application that allows users to connect their wallets, claim an NFT (if they don’t have one), stake their NFTs for rewards, and withdraw staked NFTs. The application also provides staking rewards for staked NFTs, incentivizing users to participate actively. The app ensures secure blockchain interactions through a streamlined process involving two transactions for approval and staking.
Features
Wallet Connection: Users can connect their wallets to interact with the application.
NFT Claiming: Users who do not own any NFTs can claim one to begin staking.
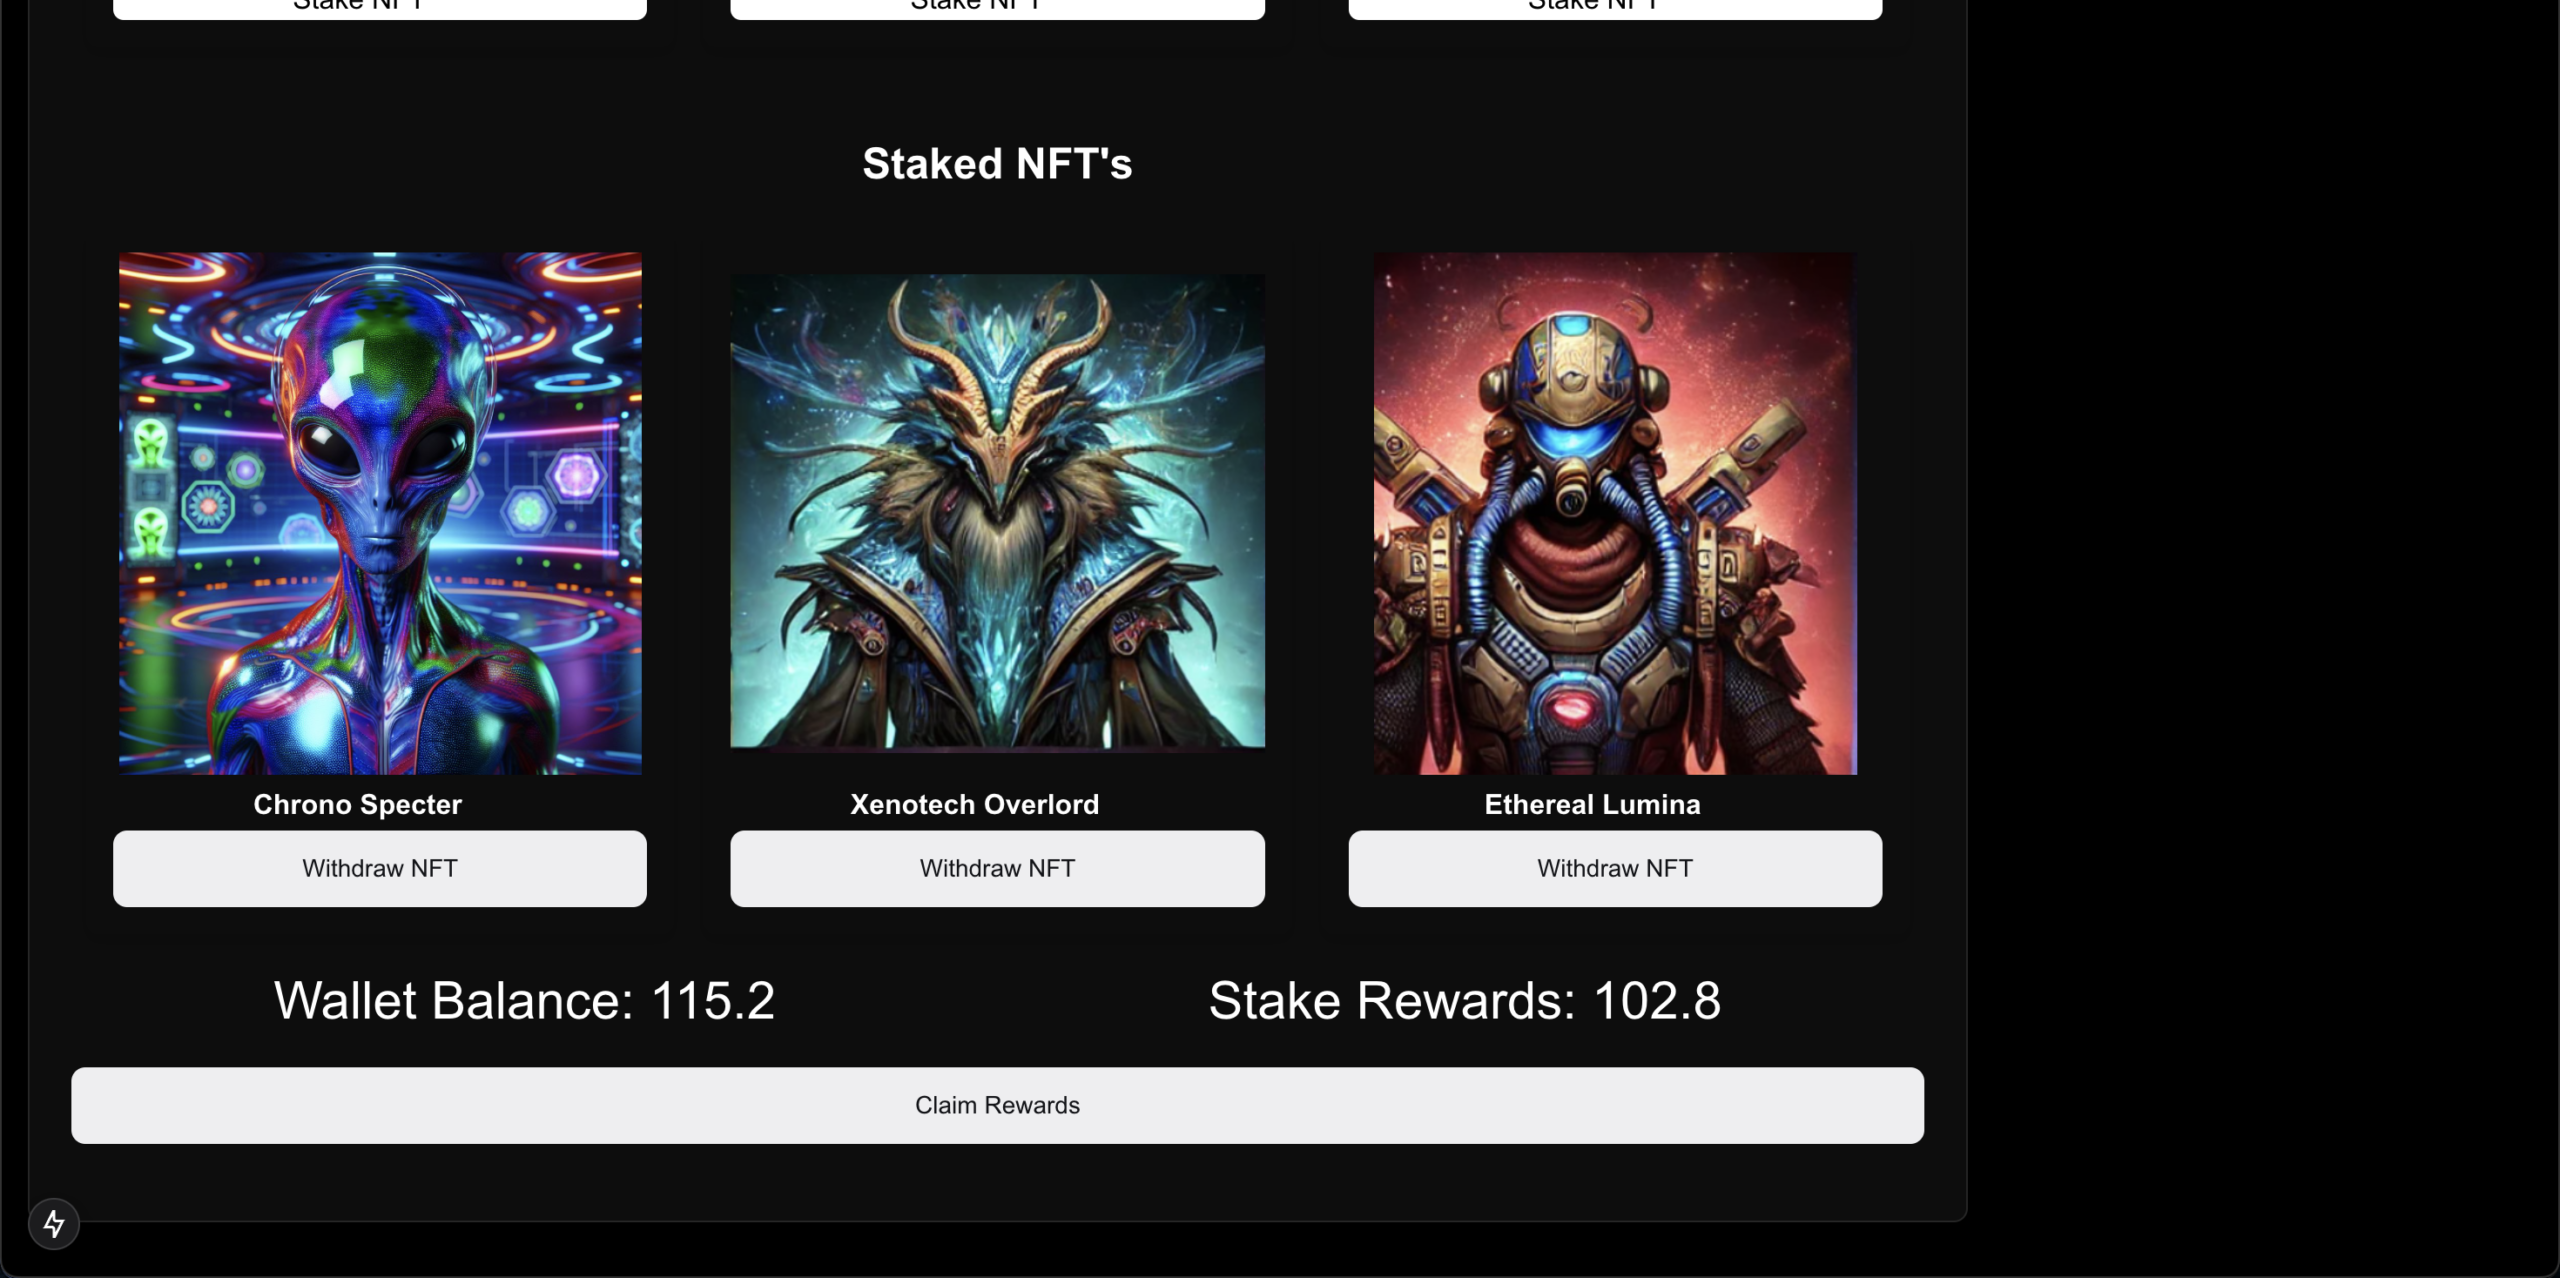
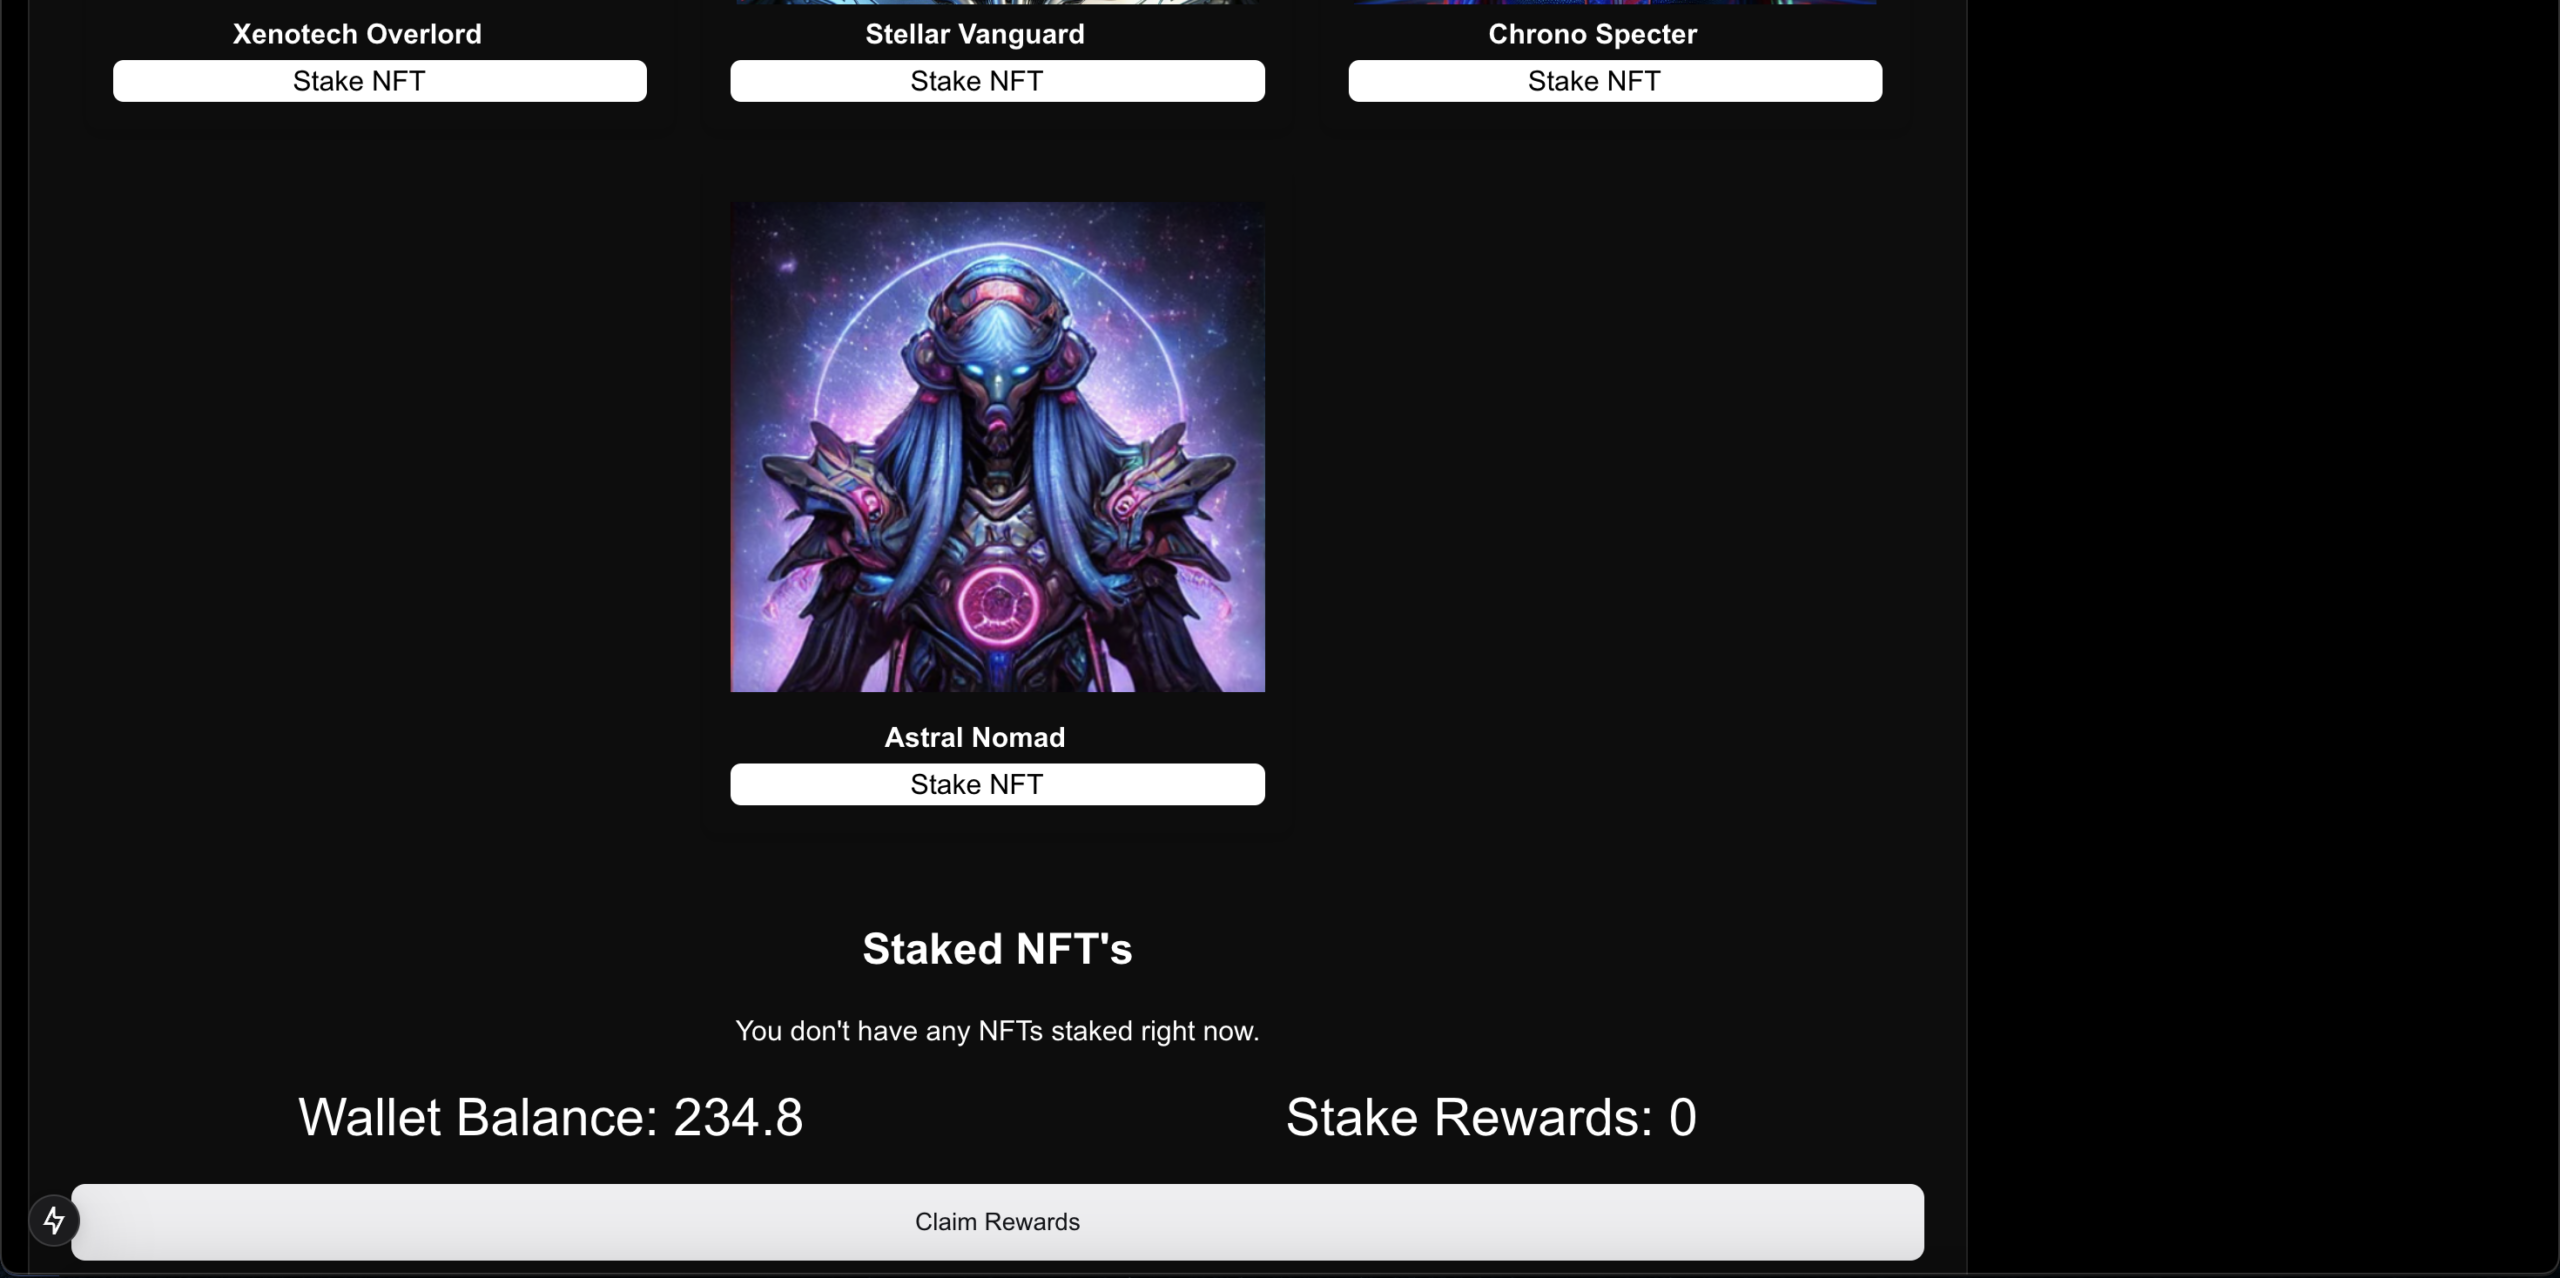
NFT Staking: Stake NFTs securely to earn rewards.
NFT Withdrawal: Withdraw any NFT that has been staked at any time.
Staking Rewards: Users earn rewards for the duration their NFTs are staked.
Transaction Flow: Two transactions are performed during staking:
Approval of the NFT for staking.
Staking of the NFT.
Tech Stack
Frontend: Next.js for server-rendered React applications.
Styling: TailwindCSS for a responsive and modern UI.
Blockchain SDK: Thirdweb for NFT and blockchain interaction.
Language: TypeScript for type-safe development.
Installation and Setup
Prerequisites
Node.js and npm installed on your machine.
Wallet provider (e.g., MetaMask) installed and configured.
Access to a blockchain network supporting NFTs (e.g., Ethereum or Polygon).
Steps
Clone the repository:
git clone https://github.com/your-repo/stakesphere.git
cd stakesphere
Install dependencies:
npm install
Configure environment variables:
Create a .env.local file in the root directory and add your blockchain provider, Thirdweb API keys, and other required credentials.
Start the development server:
npm run dev
Open the application in your browser at http://localhost:3000.
How It Works
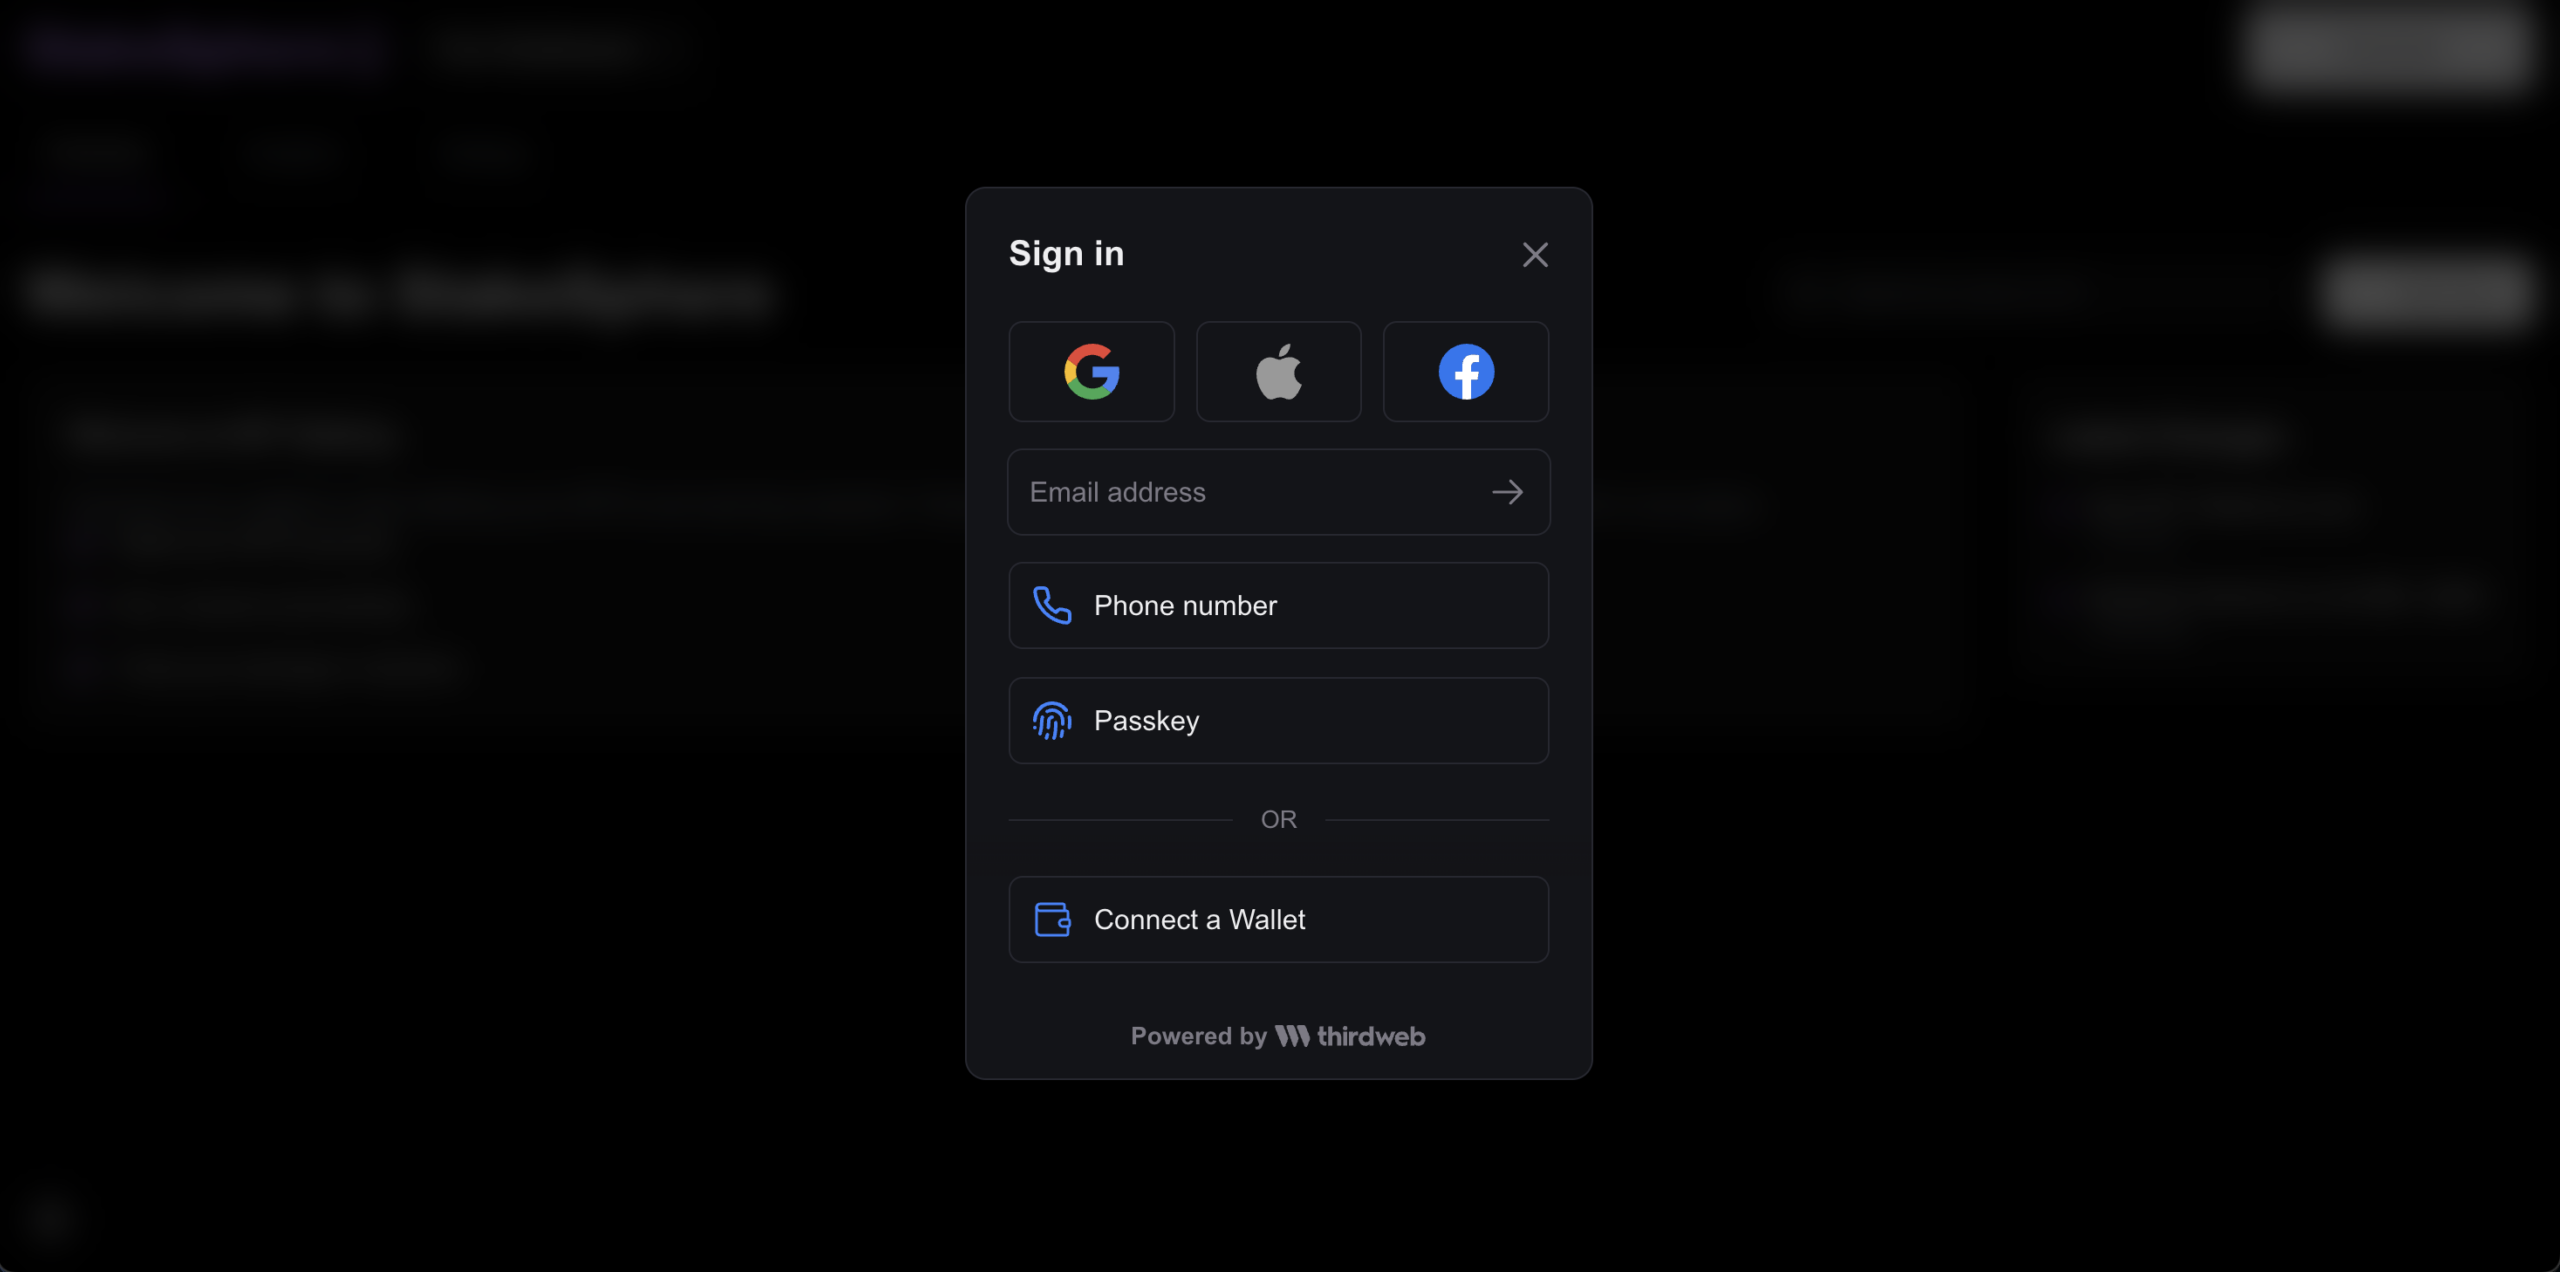
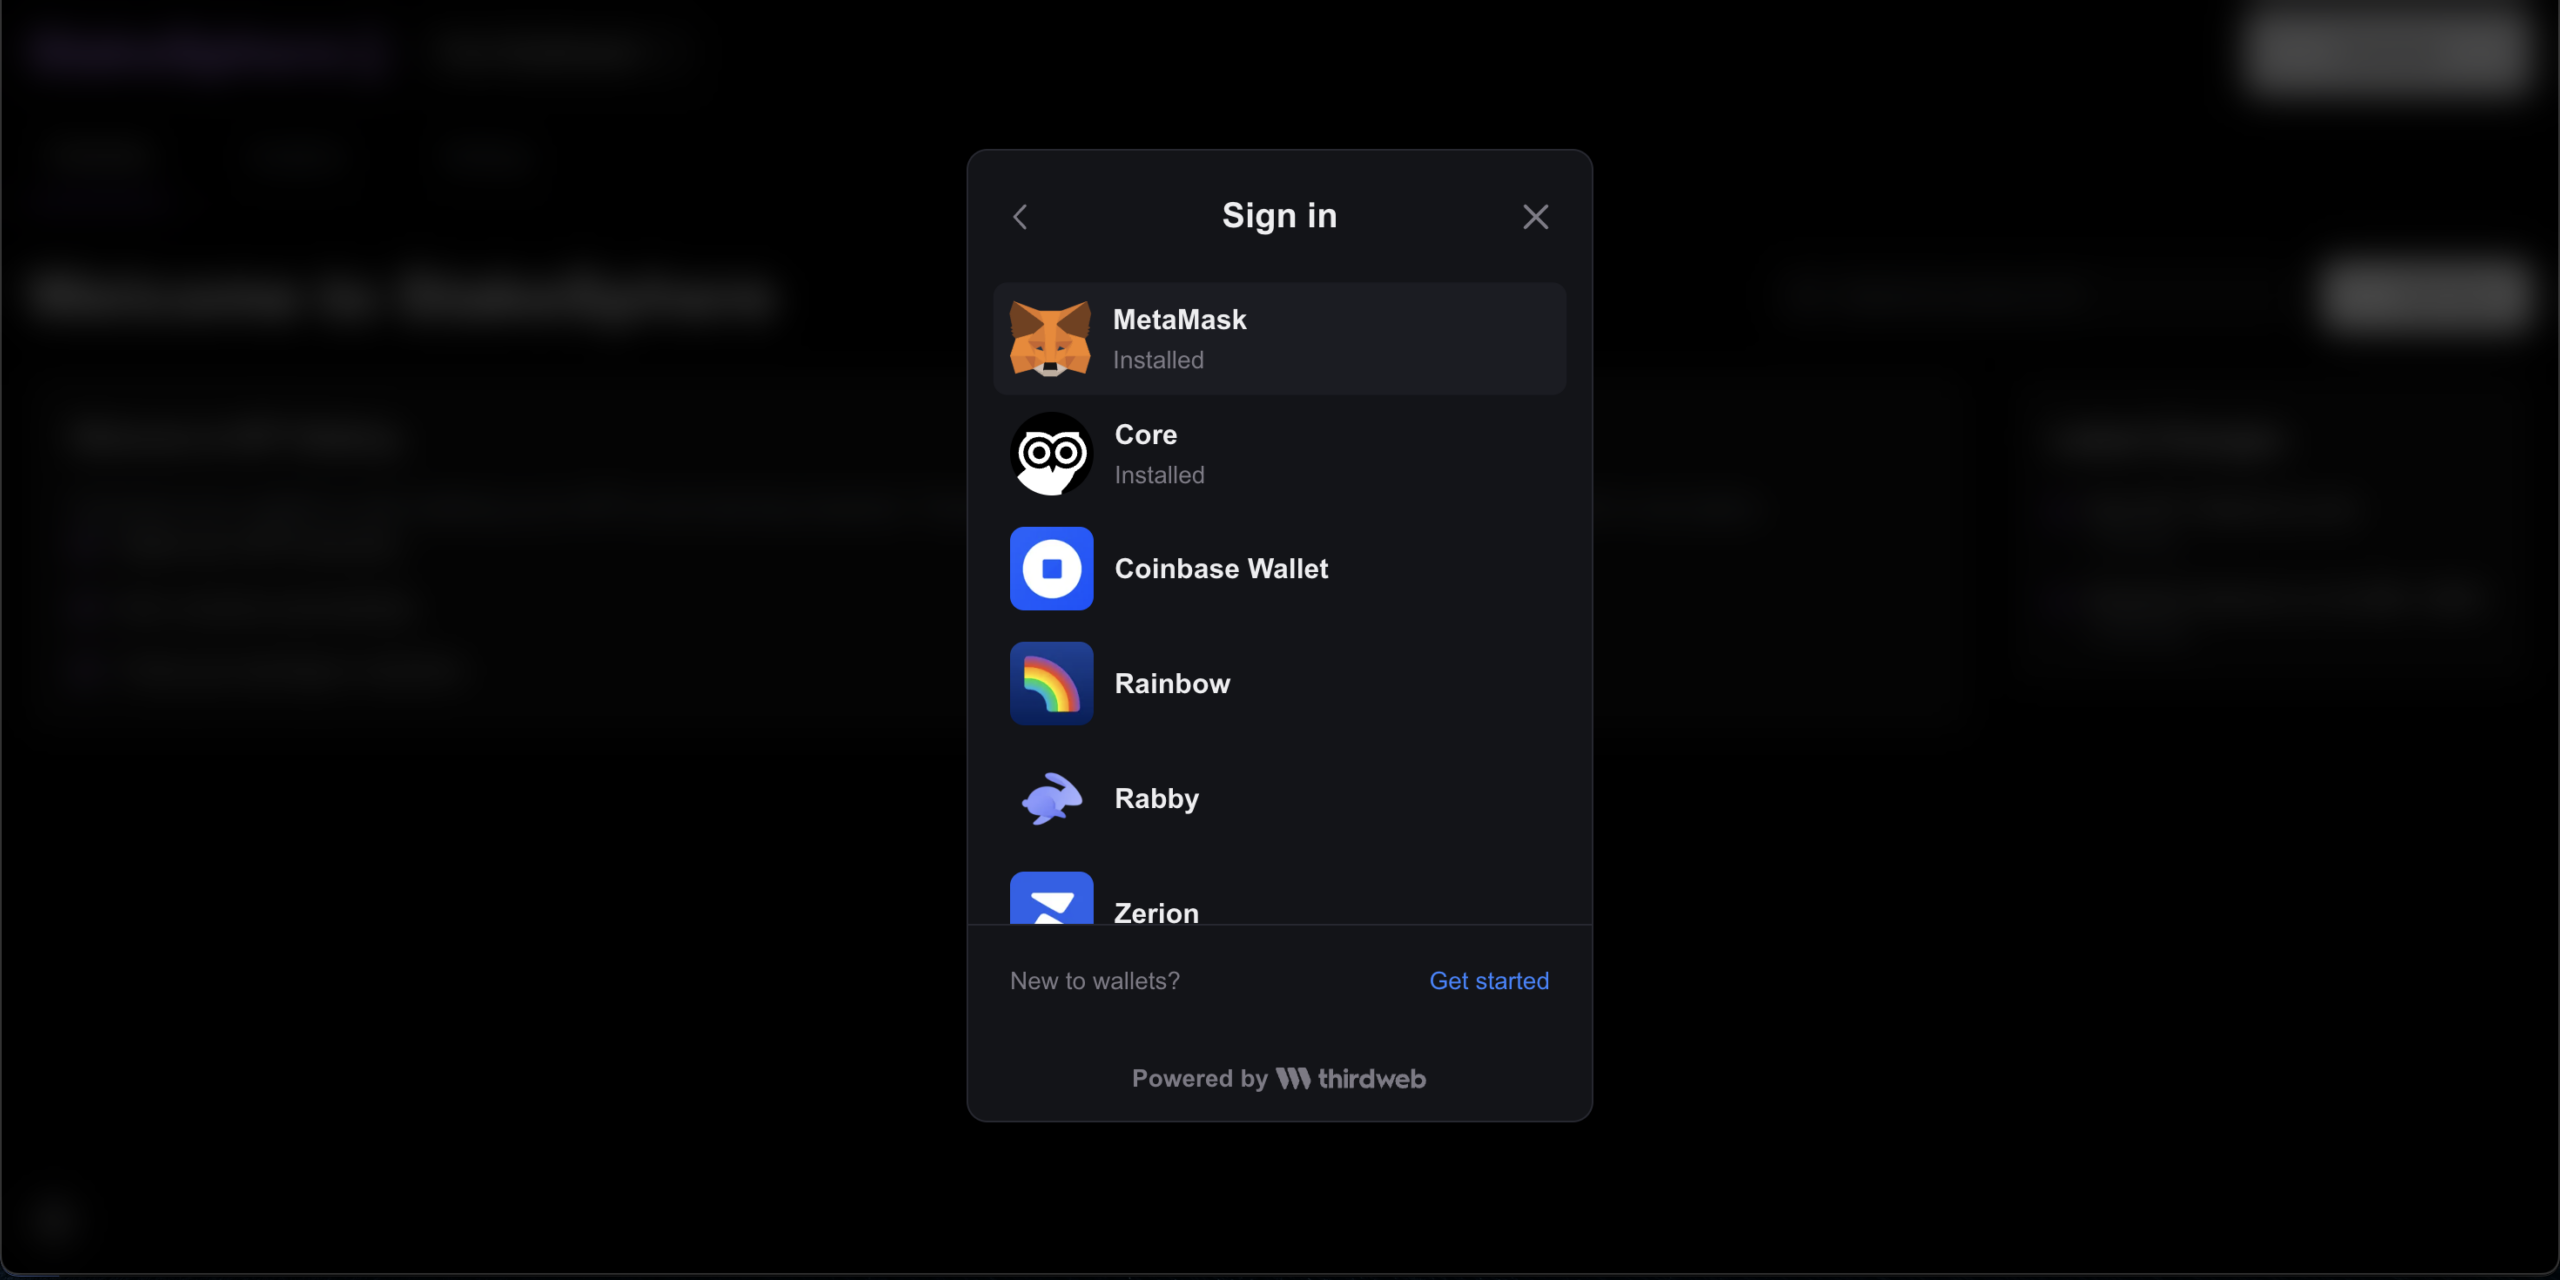
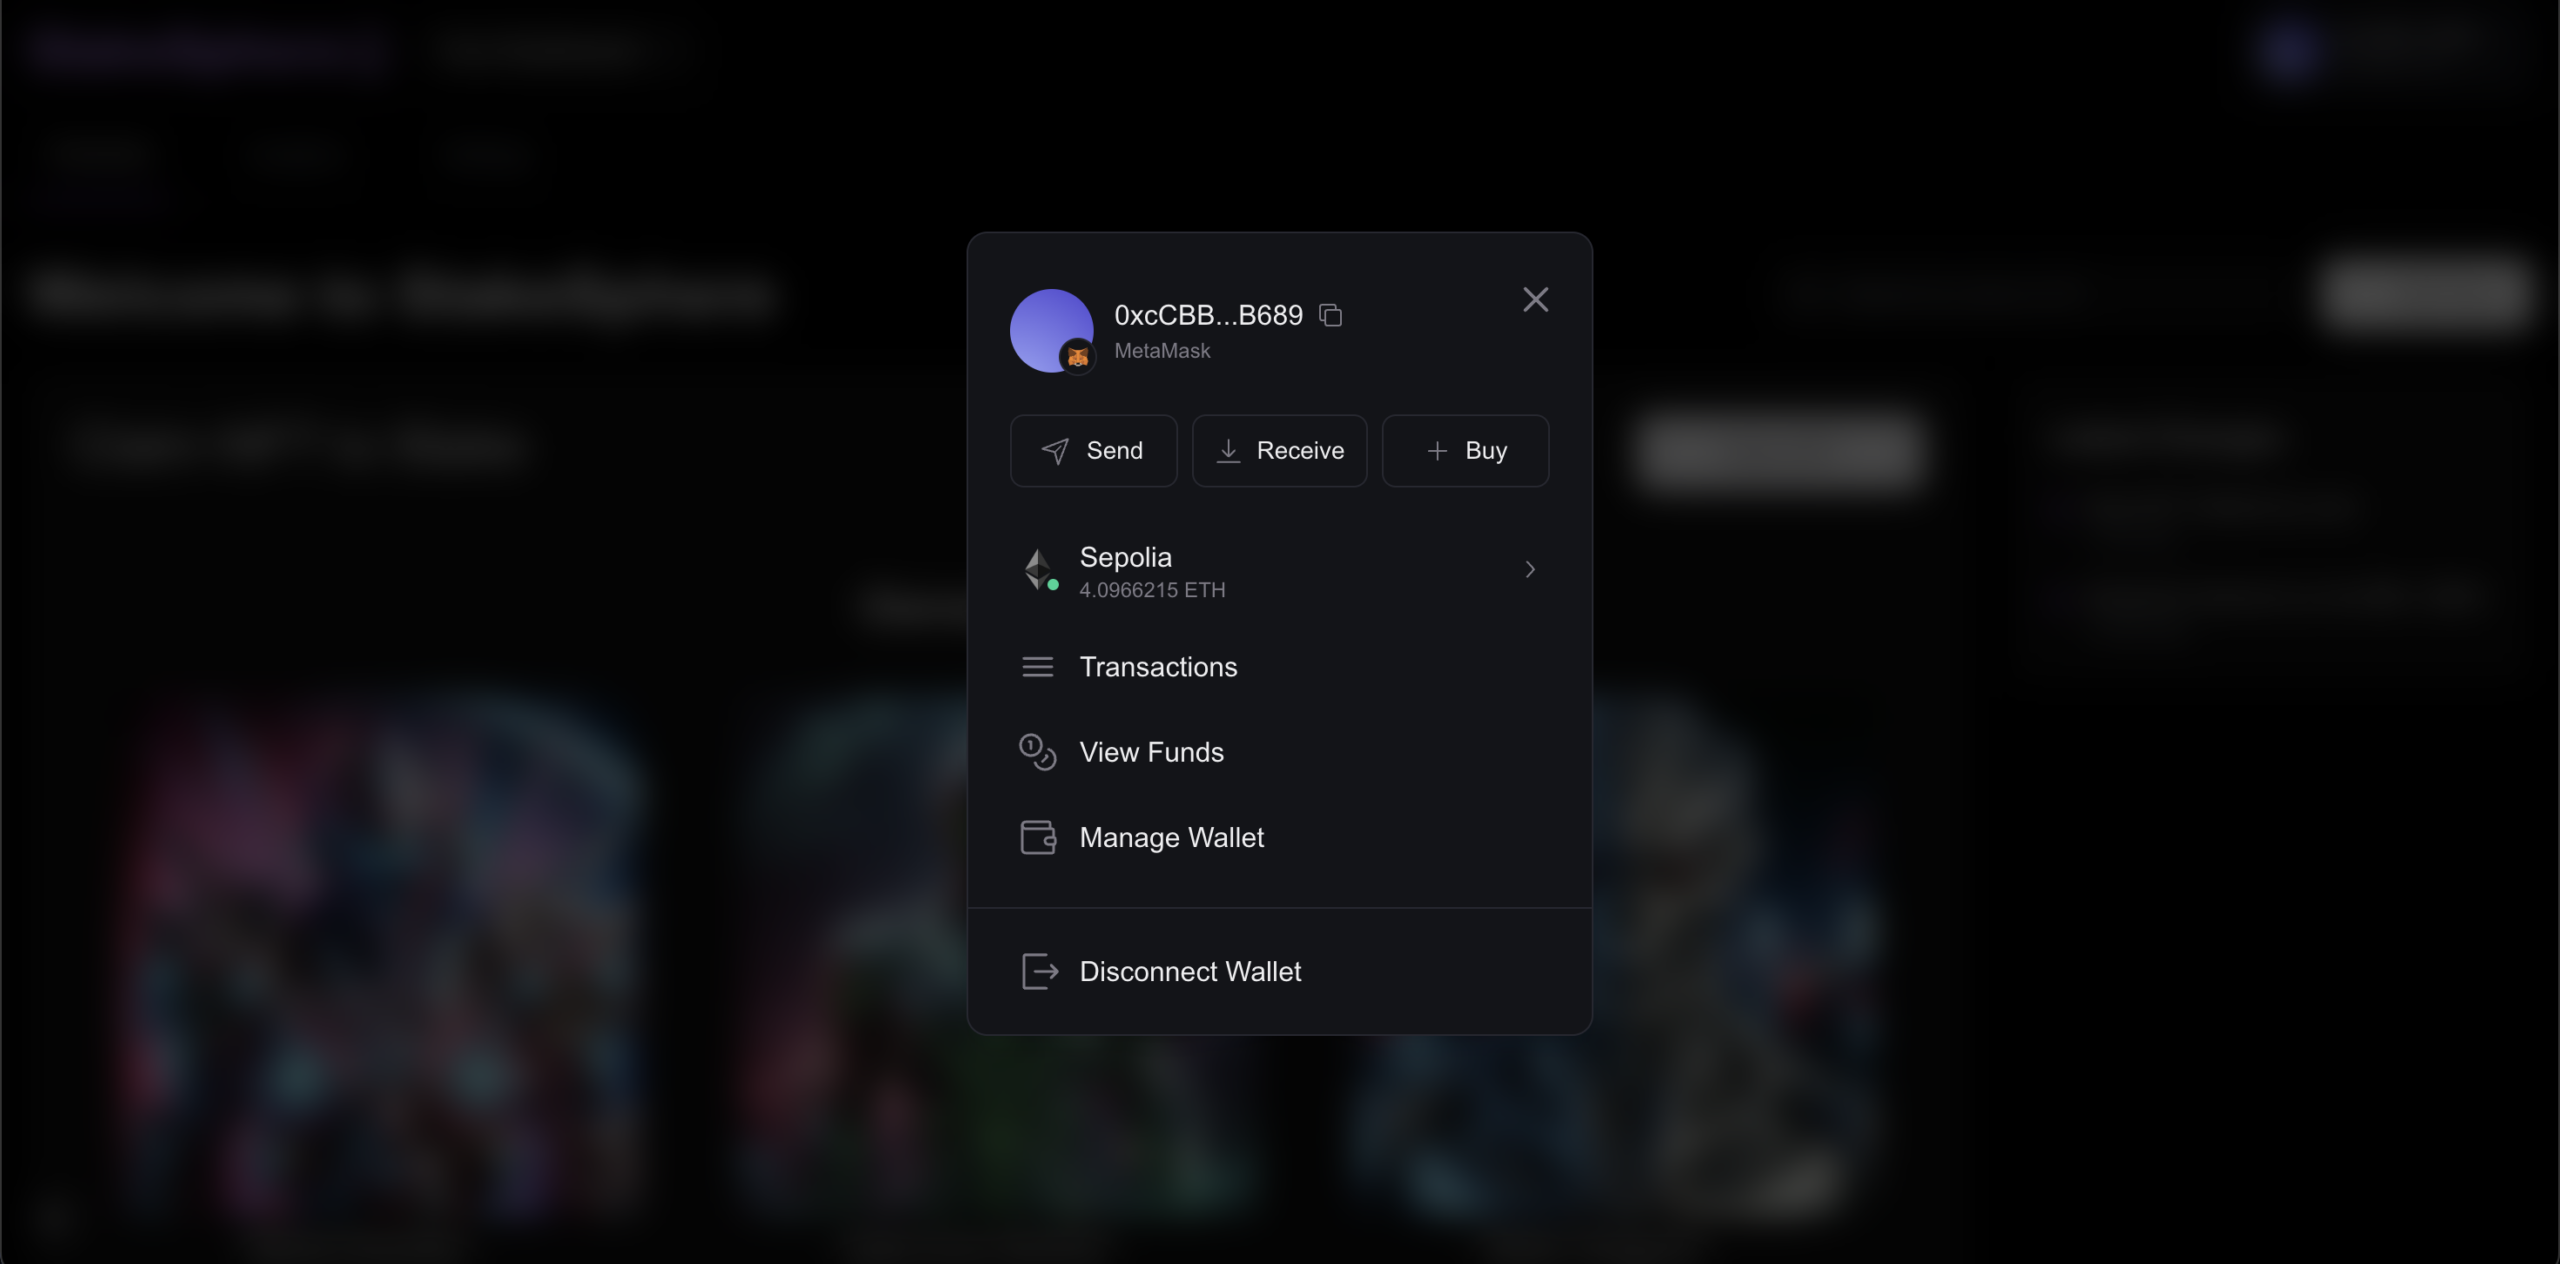
Connect Wallet:
Users connect their wallet using the wallet connect button. Supported wallets include MetaMask, Coinbase Wallet, and others.
Claim NFT:
If a user doesn’t own any NFT, they can claim one via the “Claim NFT” button. The application checks the user’s wallet before allowing staking.
Stake NFT:
Users select an NFT from their wallet.
The app prompts two transactions:
Approval of the NFT.
Staking of the NFT.
Once staked, users begin earning rewards.
Withdraw NFT:
Users can withdraw any staked NFT back to their wallet. Rewards are calculated and distributed based on the staking duration.
Contributions are welcome! Please fork the repository, create a feature branch, and submit a pull request. Ensure your code follows the project’s coding standards.
A script which recurrsively walks over a specific post and
automatically replies to (and downvotes) comments by a particular
author.
Have you ever attempted to have a regular decent conversation on
reddit like any normal human being would, only to be confronted by
a troll, a moron, or a jerk? Maybe this person is just genuinely
evil. Maybe this person just won’t let you have the last word?
It’s probably because their mother didn’t teach them good manners.
This script could enable you to repetitively shut this person down
without having to spare them even a single thought.
This is a mostly untested sript. I only wrote it to end a certain
conversation. It did a fine job at that, and it kept me from having
to waste any more time replying to that thread. I fed the script
a reply that made it quite clear that the person that I was replying
to was deficient in their mental capacities and that I had written
this bot to automatically reply to anything they wrote in my thread.
It worked perfectly. After a few rounds of interacting with my
reply bot, that person finally realized that they would never have
the last word. They moved on and dug a little deeper into their
troll hole. Good riddance.
usage
First install the packages using pip or whatever. You can use a
virtualenv if you want of course.
Run the program with the following command
python3 reddit_auto_reply.py
Currently you have to edit the script manually, filling in the
necessary details by editing certain variables manually. You
should be able to tell which variables need to be edited by going
into the program and reading the code. If you want to know more
about what variables you need to edit or how to do so, create an
issue and let me know. I’m willing to put a small amount of work
into this to make it better and more usable.
An Expected Goals (xG) model that predicts the probability of scoring based on StatsBomb data. The project uses machine learning techniques to analyze factors most influencing shot effectiveness in football. Applied models (Logistic Regression, Random Forest, XGBoost) combined with Beta calibration technique create a highly accurate predictive tool. Analysis results confirm the crucial role of shot geometry and defender influence on goal-scoring probability.
🎯 Motivation
Expected Goals (xG) is one of the most important metrics used in modern football analytics. It allows for evaluating shot quality regardless of whether they resulted in a goal. In this project, I built my own xG model to better understand factors affecting shot effectiveness and create a tool that can be used for match analysis and player evaluation.
📋 Data
The data used comes from StatsBomb’s open dataset from the 2015/2016 season for five top European leagues:
Premier League (England)
La Liga (Spain)
Bundesliga (Germany)
Serie A (Italy)
Ligue 1 (France)
The data contains detailed information about each shot, including position on the pitch, shot type, circumstances of the shot, and positioning of other players at the moment of the shot.
Note: The repository does not include data files by default. You need to run the data_collector.ipynb notebook first to download the data from StatsBomb’s open dataset.
WARNING there have been reports of apps being rejected when Reachability is used in a framework. The only solution to this so far is to rename the class.
Reachability
This is a drop-in replacement for Apple’s Reachability class. It is ARC-compatible, and it uses the new GCD methods to notify of network interface changes.
In addition to the standard NSNotification, it supports the use of blocks for when the network becomes reachable and unreachable.
Finally, you can specify whether a WWAN connection is considered “reachable”.
DO NOT OPEN BUGS UNTIL YOU HAVE TESTED ON DEVICE
BEFORE YOU OPEN A BUG ABOUT iOS6/iOS5 build errors, use Tag 3.2 or 3.1 as they support assign types
Requirements
Once you have added the .h/m files to your project, simply:
Go to the Project->TARGETS->Build Phases->Link Binary With Libraries.
Press the plus in the lower left of the list.
Add SystemConfiguration.framework.
Boom, you’re done.
Examples
Block Example
This sample uses blocks to notify when the interface state has changed. The blocks will be called on a BACKGROUND THREAD, so you need to dispatch UI updates onto the main thread.
In Objective-C
// Allocate a reachability object
Reachability* reach = [Reachability reachabilityWithHostname:@"www.google.com"];
// Set the blocks
reach.reachableBlock = ^(Reachability*reach)
{
// keep in mind this is called on a background thread// and if you are updating the UI it needs to happen// on the main thread, like this:dispatch_async(dispatch_get_main_queue(), ^{
NSLog(@"REACHABLE!");
});
};
reach.unreachableBlock = ^(Reachability*reach)
{
NSLog(@"UNREACHABLE!");
};
// Start the notifier, which will cause the reachability object to retain itself!
[reach startNotifier];
In Swift 3
import Reachability
varreach:Reachability?func application(_ application:UIApplication, didFinishLaunchingWithOptions launchOptions:[UIApplicationLaunchOptionsKey:Any]?)->Bool{
// Allocate a reachability object
self.reach =Reachability.forInternetConnection()
// Set the blocks
self.reach!.reachableBlock ={(reach:Reachability?)->Voidin
// keep in mind this is called on a background thread
// and if you are updating the UI it needs to happen
// on the main thread, like this:
DispatchQueue.main.async{print("REACHABLE!")}}self.reach!.unreachableBlock ={(reach:Reachability?)->Voidinprint("UNREACHABLE!")}self.reach!.startNotifier()returntrue}
NSNotification Example
This sample will use NSNotifications to notify when the interface has changed. They will be delivered on the MAIN THREAD, so you can do UI updates from within the function.
In addition, it asks the Reachability object to consider the WWAN (3G/EDGE/CDMA) as a non-reachable connection (you might use this if you are writing a video streaming app, for example, to save the user’s data plan).
In Objective-C
// Allocate a reachability object
Reachability* reach = [Reachability reachabilityWithHostname:@"www.google.com"];
// Tell the reachability that we DON'T want to be reachable on 3G/EDGE/CDMA
reach.reachableOnWWAN = NO;
// Here we set up a NSNotification observer. The Reachability that caused the notification// is passed in the object parameter
[[NSNotificationCenterdefaultCenter] addObserver:selfselector:@selector(reachabilityChanged:)
name:kReachabilityChangedNotificationobject:nil];
[reach startNotifier];
In Swift 3
import Reachability
varreach:Reachability?func application(_ application:UIApplication, didFinishLaunchingWithOptions launchOptions:[UIApplicationLaunchOptionsKey:Any]?)->Bool{
// Allocate a reachability object
self.reach =Reachability.forInternetConnection()
// Tell the reachability that we DON'T want to be reachable on 3G/EDGE/CDMA
self.reach!.reachableOnWWAN =false
// Here we set up a NSNotification observer. The Reachability that caused the notification
// is passed in the object parameter
NotificationCenter.default.addObserver(self,
selector: #selector(reachabilityChanged),
name:NSNotification.Name.reachabilityChanged,
object:nil)self.reach!.startNotifier()returntrue}func reachabilityChanged(notification:NSNotification){ifself.reach!.isReachableViaWiFi() || self.reach!.isReachableViaWWAN(){print("Service available!!!")}else{print("No service available!!!")}}
val applicationContext: Application

val application: Application

val activityList: List<Activity>

val topActivity: Activity

val topActivityOrNull: Activity?

val topFragmentActivityOrNull: FragmentActivity?

val topActivityOrApplication: Context
Documentation is available on JitPack for the master branch.
Javadoc documentation can be generated by running the following command:
./gradlew javadoc
The HTML documentation will be placed in ./target/site/apidocs/index.html
HMAC+HKDF Authentication
HMAC+HKDF Authentication is an Authentication method that allows ensures the request is not tampered with in transit. This provides resiliance not only against network layer manipulation, but also man-in-the-middle attacks.
At a high level, an HMAC signature is created based upon the raw request body, the HTTP method, the URI (with query parameters, if present), and the current date. In addition to ensuring the request cannot be manipulated in transit, it also ensures that the request is timeboxed, effectively preventing replay attacks.
The library itself is made available by importing the following struct:
Supporting API’s will return the following payload containing at minimum the following information.
This string can be used in the Authorization Header
Date Header
The Version 1 HMAC header requires an additional X-Date header. The X-Date header can be retrieved by calling auth.getDateString()
Encrypted Requests & Responses
This library enables clients to establish and trusted encrypted session on top of a TLS layer, while simultaniously (and independently) providing the ability authenticate and identify a client via HMAC+HKDF style authentication.
The rationale for this functionality includes but is not limited to:
Need to ensure confidentiality of the Initial Key Material (IKM) provided by the server for HMAC+HKDF authentication
Need to ensure confidentiality of user submitted credentials to the API for authentication
The primary reason you may want to establish an encrypted session with the API itself is to ensure confidentiality of the IKM to prevent data leakages over untrusted networks to avoid information being exposed in a Cloudflare like incident (or any man-in-the-middle attack). Encrypted sessions enable you to utilize a service like Cloudflare should a memory leak occur again with confidence that the IKM and other secure data would not be exposed.
To encrypt, decrypt, sign, and verify messages, you’ll need to be able to generate the appropriate keys. Internally, this library uses lazysodium-java to perform all necessary cryptography functions, though any libsodium implementation for Java would suffice.
Encryption Keys
Encryption uses a sodium crypto box. A keypair can be generated as follows when using lazy-sodium.
importcom.ncryptf.Request;
importcom.ncryptf.exceptions.*;
importjava.util.Base64;
// Arbitrary string payloadStringpayload = "{\"foo\":\"bar\"}";
try {
// 32 byte secret and public key. Extract from kp.get...().getAsBytes(), or another libsodium methodRequestrequest = newRequest(secretKeyBytes, signingSecretKeyBytes/* token.signature */);
// Cipher now contains the encryted data// Signature should be the signature private key previously agreed upon with the sender// If you're using a `Token` object, this should be the `.signature` propertybyte[] cipher = request.encrypt(payload, remotePublicKey);
// Send as encrypted request bodyStringb64Body = Base64.getEncoder().encode(cipher);
// Do your http request here
} catch (EncryptionFailedExceptione) {
// Handle encryption errors here
}
Note that you need to have a pre-bootstrapped public key to encrypt data. For the v1 API, this is typically this is returned by /api/v1/server/otk.
Decrypting Responses
Responses from the server can be decrypted as follows:
importcom.ncryptf.Response;
importcom.ncryptf.exceptions.*;
importjava.util.Base64;
try {
// Grab the raw response from the serverbyte[] responseFromServer = Base64.getDecoder().decode("<HTTP-Response-Body>");
Responseresponse = newResponse(clientSecretKey);
Stringdecrypted = response.decrypt(responseFromServer, remotePublicKey);
} catch (InvalidChecksumExceptione) {
// Checksum is not valid. Request body was tampered with
} catch (InvalidSignatureExceptione) {
// Signature verification failed
} catch (DecryptionFailedExceptione) {
// Decryption failed. This may be an issue with the provided nonce, or keypair being used
}
V2 Encrypted Payload
Verison 2 works identical to the version 1 payload, with the exception that all components needed to decrypt the message are bundled within the payload itself, rather than broken out into separate headers. This alleviates developer concerns with needing to manage multiple headers.
The version 2 payload is described as follows. Each component is concatanated together.